
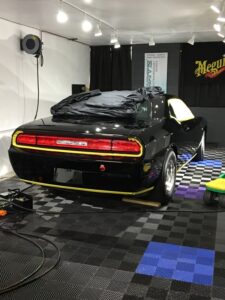
Having to be trailered to our Gilbert location (due to it not being street legal), it had a rather unassuming presence about it. From 10 feet back, if you didn’t take note of the racing slicks and battery switch on the rear bumper, you wouldn’t know this was one of 50 Dodge Challenger Drag Paks.
If you did happen to walk up a bit closer to take a look at the inside, the fully caged interior may pique your interest. However, once you saw what was under the hood, your intrigue would likely be confirmed.
Now, if you’ve recovered from the initial shock of how bad this paint was before, we will continue our journey…
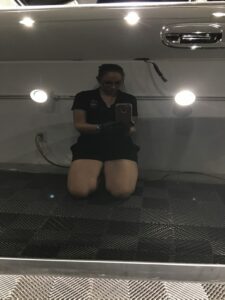
You see, the paint on this Challenger was not totally factory. It had been re-sprayed and received a full wet sand (evident by all the sanding marks left in the paint!) to remove orange peel and achieve a higher level of clarity. However, that whole clarity and gloss thing doesn’t quite come together without the proper finishing work. In the shade, the reflections were decent and not as “wavy” as you typically see on today’s factory paint jobs. However, under direct lighting, the paint’s finish was fairly frightening.
Let’s take a closer look at the car in its entirety:


What you’re seeing above is a combination of different types of defects in the paint. We have lots of swirl marks and random deep scratches. Also, you will see lots of “buffer marks,” which are also called holograms due to their 3D appearance when seen in person. Lastly, the dull-grey-looking spots are actually sanding marks (which can also be described as uniform deep scratches). The graph below will help to put a more precise visual to what you see above.
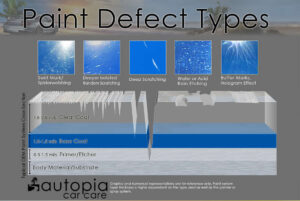
As you can see, this was not an “isolated” section of damaged paint. No, no—it had taken over! Top to bottom, this whole car was covered with buffer trails from the previous detailer, sanding marking, RIDS (random isolated deep scratches), and even some things we are not able to fix (fish eyes and solvent pops). We had, undoubtedly, quite the battle in front of us.
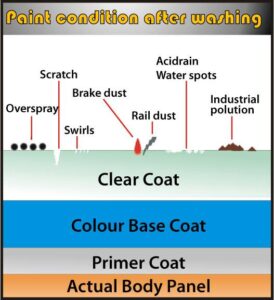
Once washed, we needed to remove any bonded contaminants on the paint (such as overspray, body shop dust, brake dust, fallout, and so on).
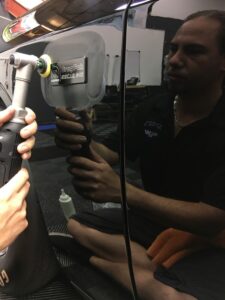
Once the bonded topical contaminants had been removed, it was then time to put together a paint correction process that would work well with this particular car. Every paint job is different and requires a unique approach depending on multiple factors (hardness or softness of the paint, paint age, paint thickness, etc.), so we treat each car on a case-by-case basis. There is no “one size fits all” when it comes to paint correction.


Now that we knew the combo for our first line of attack, it was off to the races—a very slow, tedious, time-consuming race!


Another interesting note on these cars…the owner informed us the side windows are plexi-glass. Thus, they’re much easier to scratch than standard glass. We took a little extra precaution by applying plastic over them and, of course, taped off all 1,832 miles of plastic trim as well to ensure that while polishing the paint we did not stain the trim.

It was very small, but we saw it, so we wanted it gone!
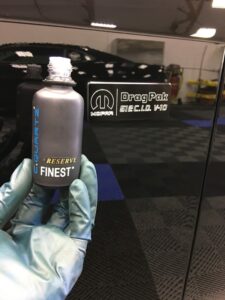
For especially deep sanding marks, like what we had circled, Meguiars M100 was what we reached for to be able to give us the extra cut we needed to remove deeper scratches.
Our little Rupes iBrid Nano also comes in extremely handy for jobs like this. When put into rotary mode, it was a great tool to trace around the badges to get as close as possible without damaging the badge itself:


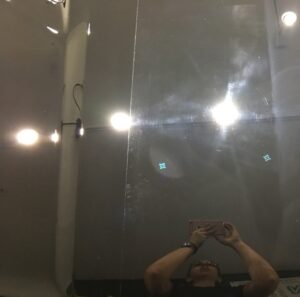
After two coats, with an hour of wait time between coats, the gloss on this unique Challenger was coming to life:


You can see our yellow infrared (IR) lamps in the reflection of the fender here. IR lamp curing is a must when installing a high-grade nano ceramic paint coating. It allows the coating to actually swell up and cure a bit thicker, harder, and glossier. It also catalyzes the bonding of the product to the paint, which is most definitely what we want.
The finished product was truly something to behold:


It was a long and hard-fought battle, but in the end, we were able to win. Considering this was the third vehicle the same owner has brought to us, I think it’s safe to say he’s been satisfied with our work (the others were also both black, both swirled, and both awesome muscle cars—GT350 and an all-original 1981 Z28 Camaro with 5,000 original miles).
I hope you all enjoyed the eye candy, the process, and more of the eye candy! I will be back soon with more fun paint correction and details we’ve been working on.
Thanks all

